How to build a simple map for your community
The article describes how to create a simple but beautiful world map which is powered by GitHub Pages and Leaflet that allows for your users to add and manage their entries themselves.
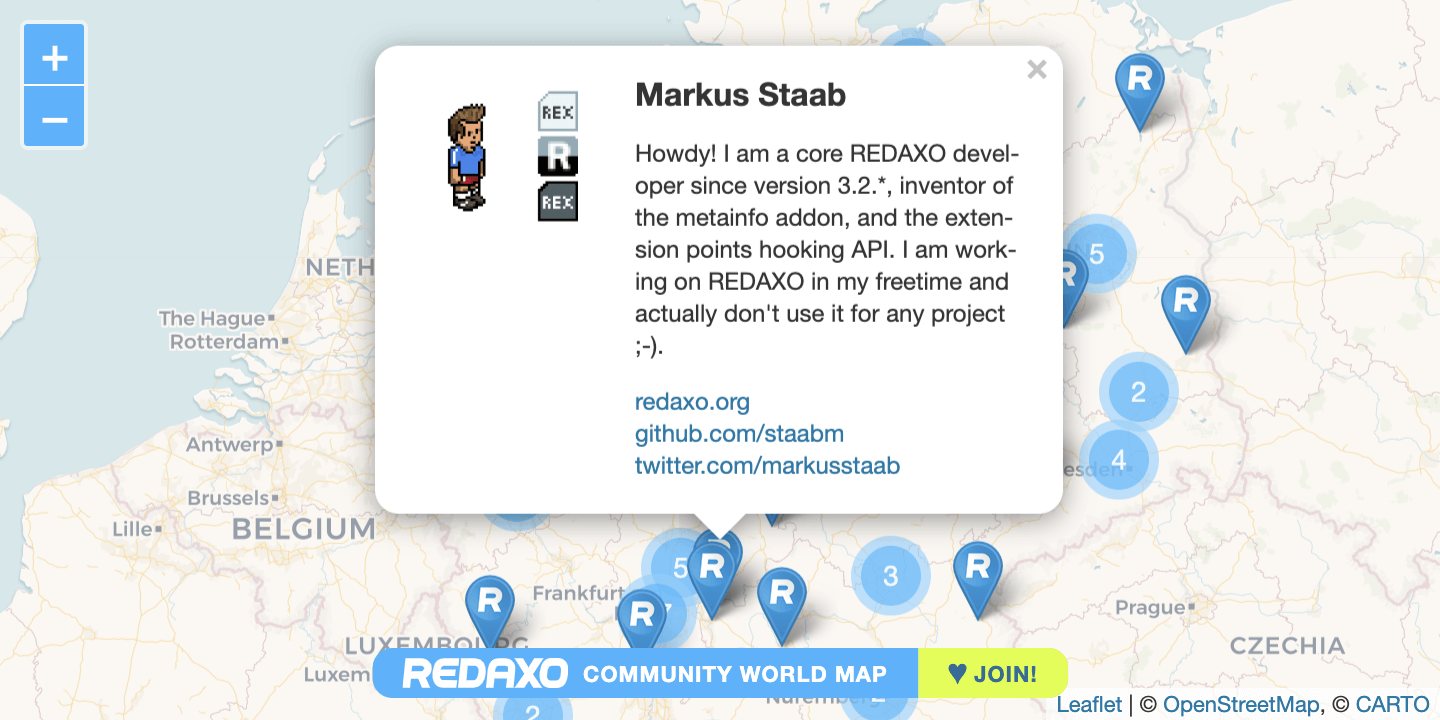
👉 https://friendsofredaxo.github.io/community/
First of all: why that map? Because it’s great to see your community, to have it visualized on a map. It is also a chance to pay attention to everyone involved in the community. Share your location and your motivation to participate in the project and let everyone get an equal marker! ♥
It’s pretty easy, this is what you need:
1. A GitHub repo with Pages enabled
The repo will contain your map website later on. It’s a static website which is generated and hosted by GitHub. They call it GitHub Pages, and it’s a pretty cool feature!
Set up your empty repository and enable GitHub Pages in the repo settings. When enabled it should look like this:
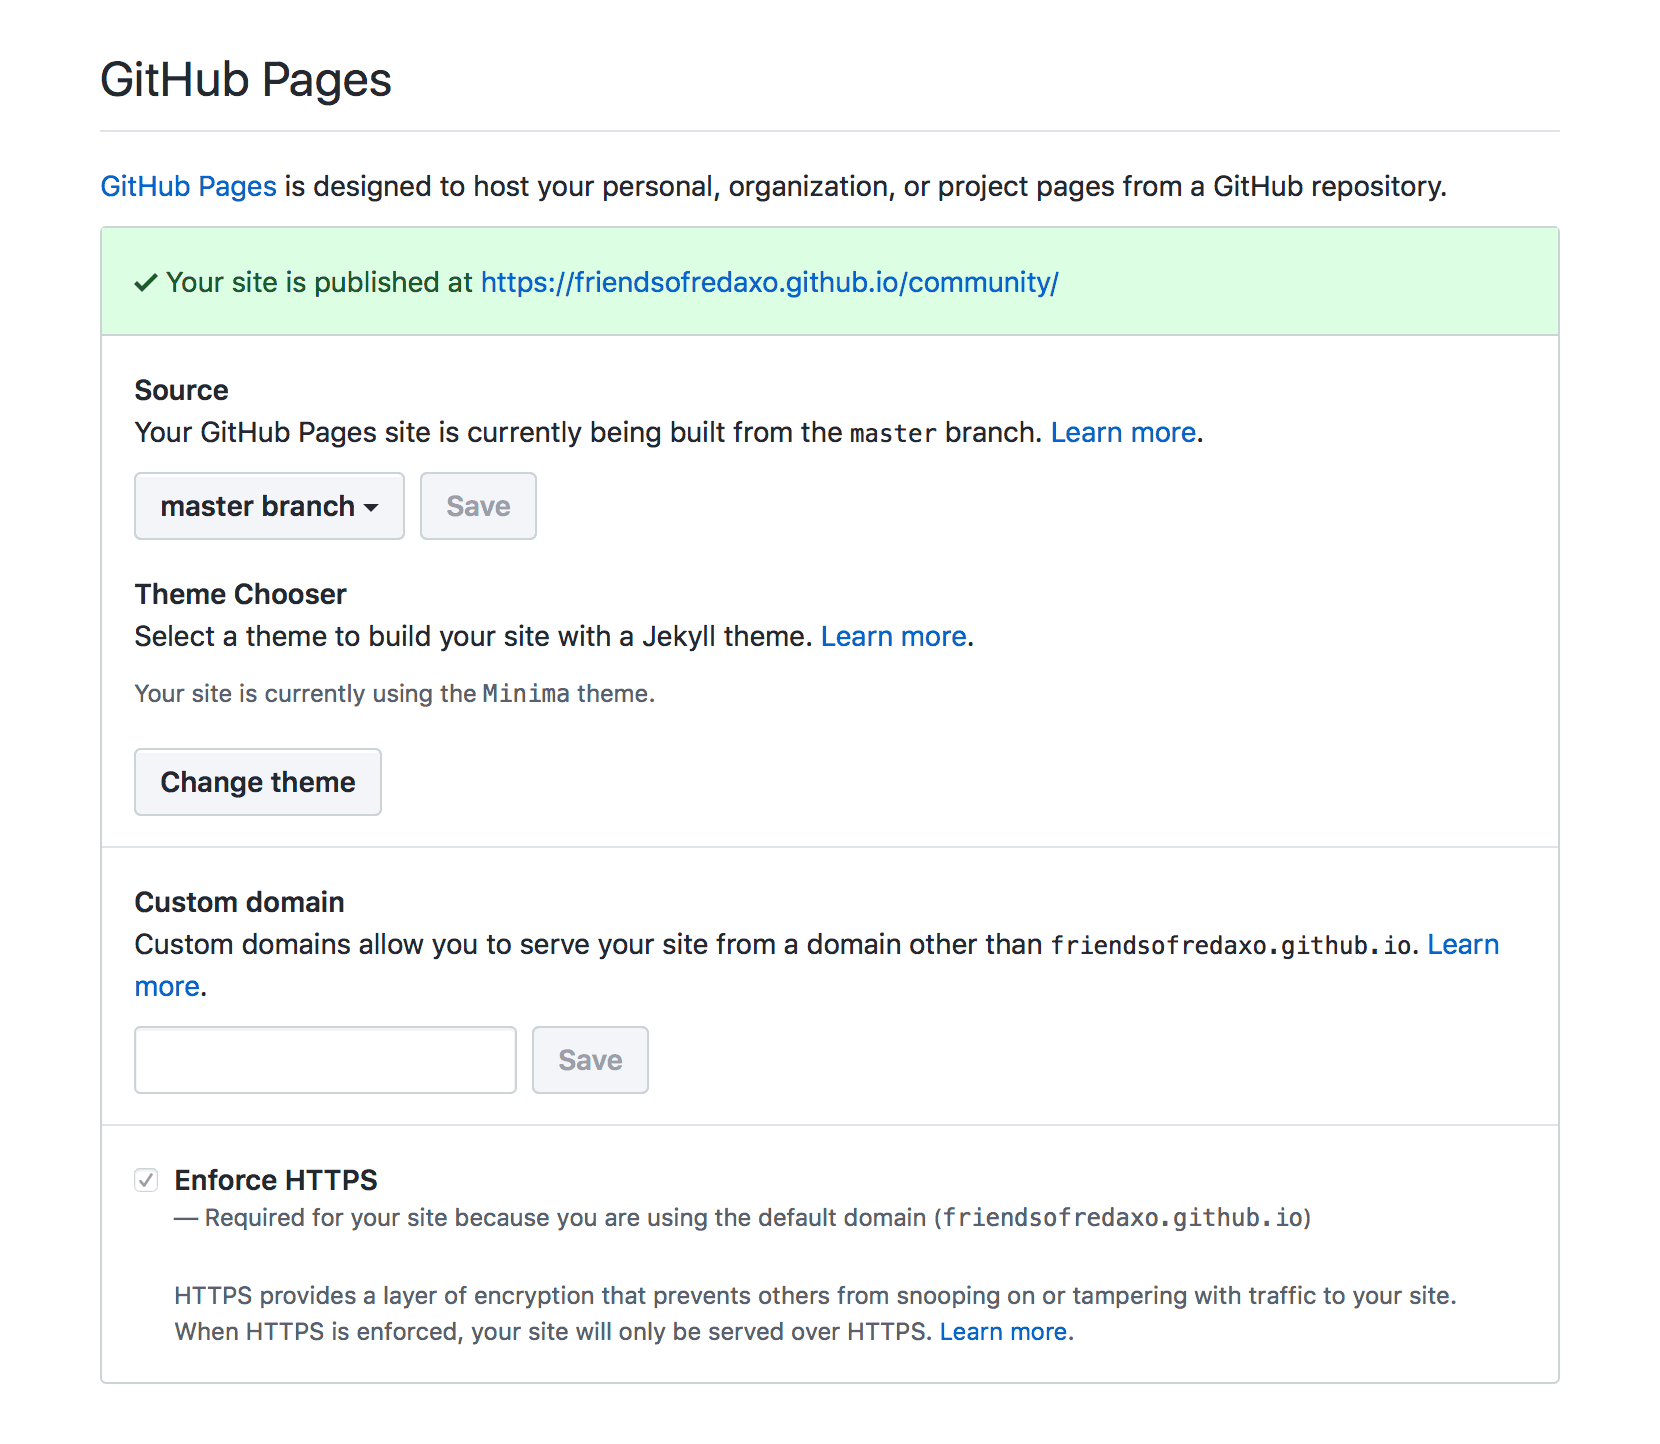
You’ll find detailed instructions at GitHub Pages Basics.
For our REDAXO community map, we use the master branch of the repo community, which is part of the organization FriendsOfREDAXO. Our website is published at https://friendsofredaxo.github.io/community/.
GitHub even allows you to use a custom domain. Awesome!
2. The directory containing all map data
The repo not only contains the website but also all map data. Your community members will be able to add and manage their markers by sending pull requests. More on the topic later on.
You’ll need a folder with a leading underscore to keep the map data. The underscore is required for Jekyll, the software GitHub uses to generate your website, to identify the folder as a collection. In our project, we named the folder _directory.
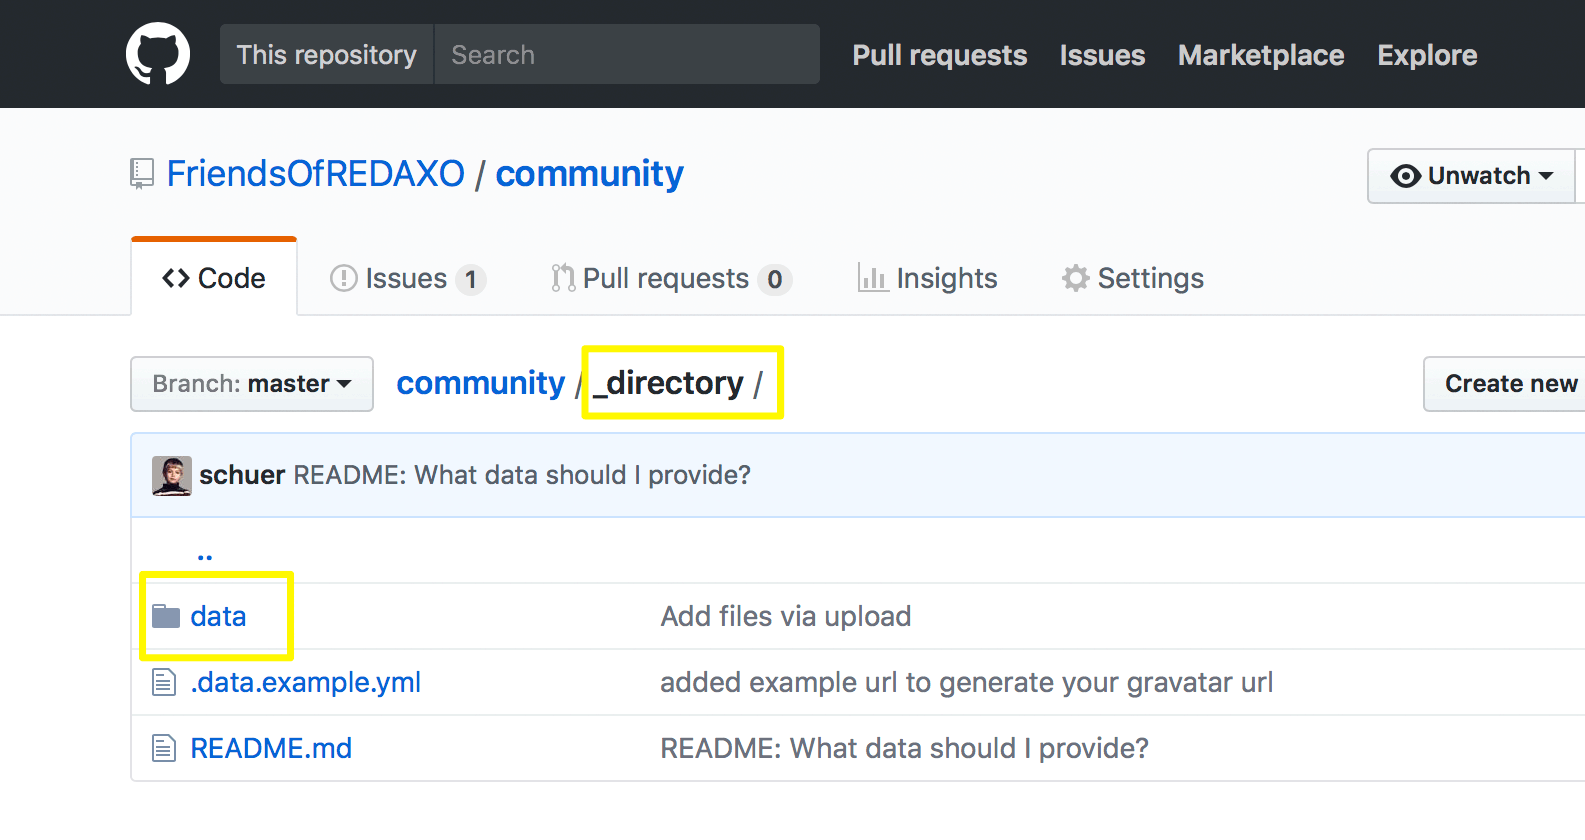
We add another data folder to keep _directory short and improve visibility of the README.md which will contain instructions on how to manage the map later on. The data folder will be populated by your community members.
How about the data structure? Have a look at the example file .data.example.yml, it’s a blueprint for a map entry. Any of your community members can add their custom folder to data and place a data.yml inside containing their marker location and user profile.
—This is what our data folder looks like: _directory/data.
For now, add your own entry or copy some of ours and start implementing the website:
3. Website implementing Leaflet maps
Leaflet is awesome. It’s extremely lightweight with no external dependencies. You can choose between various tile providers for your map, like OpenStreetMaps, Mapbox, HERE. We decided to go for the beautiful CARTO basemaps which are free to use up to 75,000 mapviews per month.
To make leaflet grab our map data, we inject it right into the HTML at the bottom of our page. This is dead easy with Jekyll collections, have a look at the index.html.
Leaflet requires just a little JavaScript to set up the map for us, see assets/js/script.js.
Basically, that’s it. There’s some Jekyll configuration (_config.yml), templating (_layouts) and stuff, but you’ll find out once you dive into the documentation.
—For now, just copy our code and start building your own map! 🎉
4. Instructions on how to add and manage markers
This is very important: if you want your community members to participate in the map, you should explain how it works! Best place to do it may be the README.md file inside of the _directory folder:
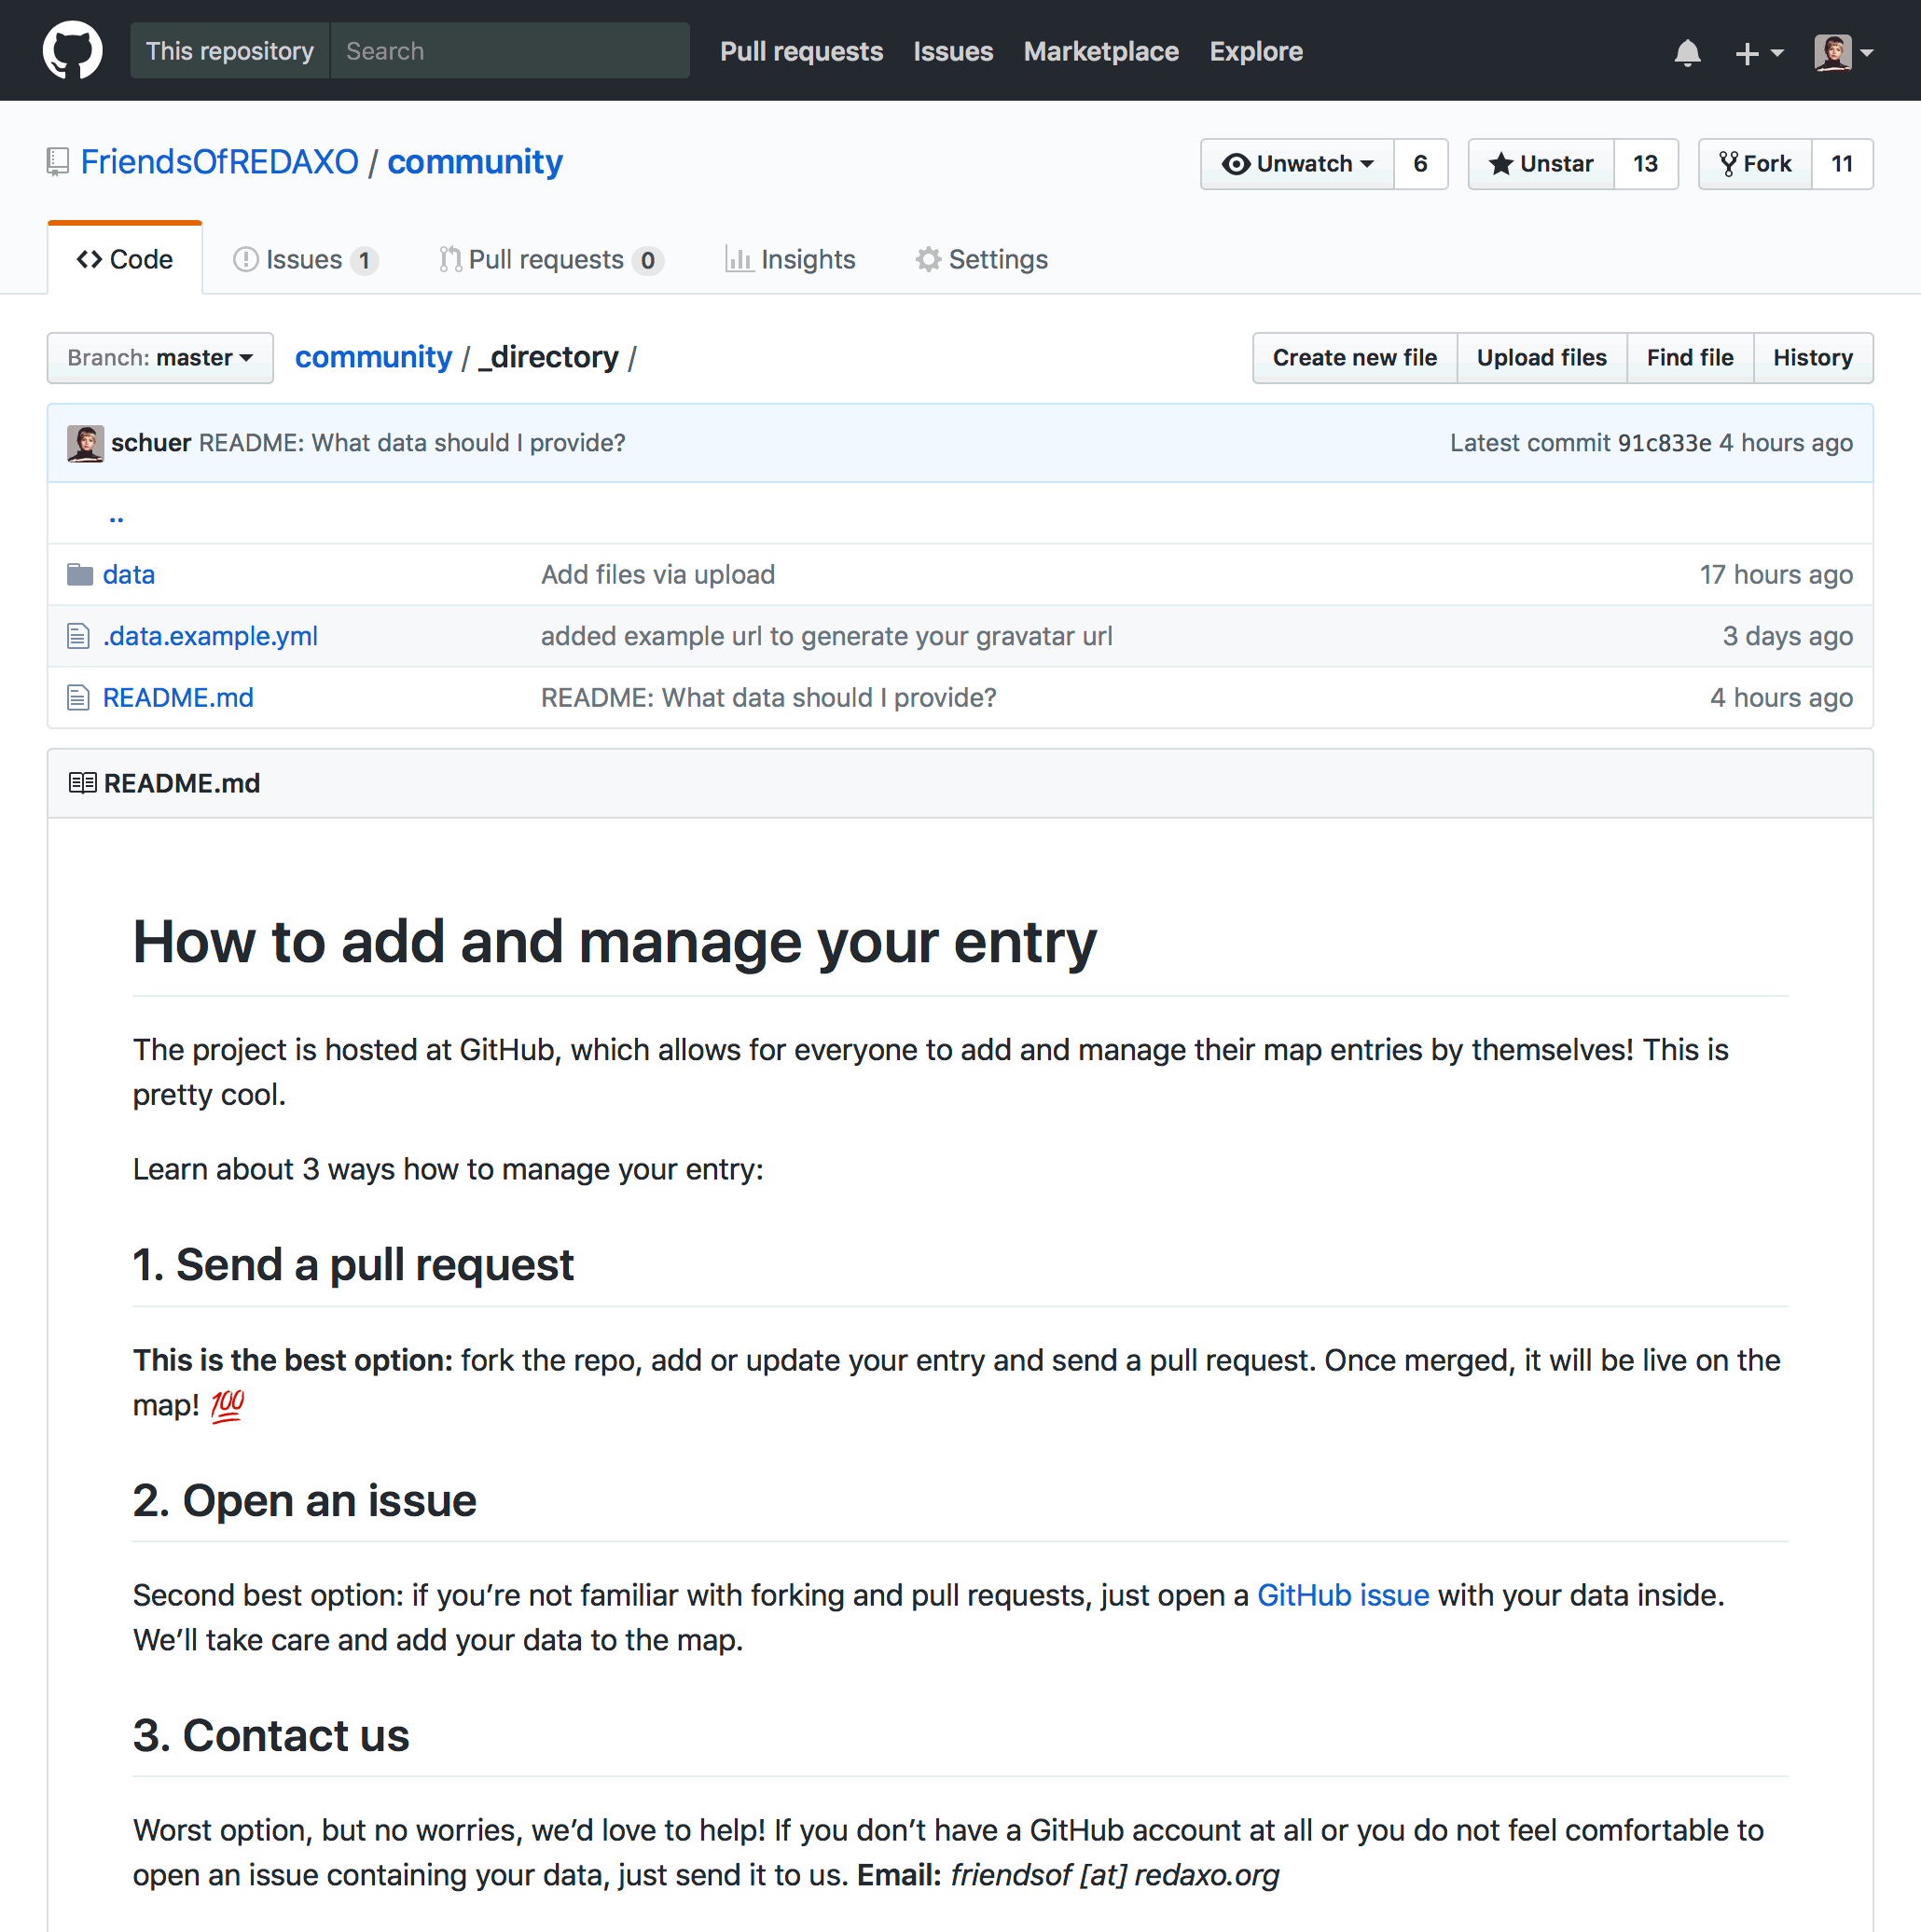
We provide 3 options: send a pull request, open an issue or contact us. The first one is preferred as it allows people to add and manager their entry by themselves. But keep in mind not everyone is able to handle pull requests! Some people might not have a GitHub account at all, so you’d better provide help to add their entries. 🙋♂️🙋
That’s it, have fun with your map! 🚀 In case you struggle or have questions, we’d recommend to set up a GitHub issue. Or even better join our Slack chat! You’ll receive an invitation when providing your email at https://redaxo.org/slack/.